Schedule Future Payments
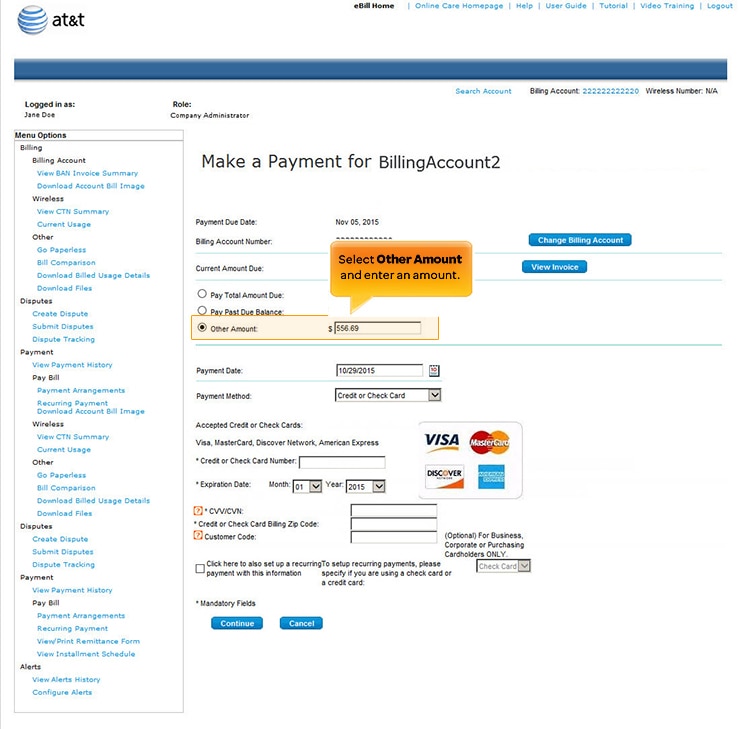
This payment options lets you make payments at specified future dates. You access this option on the Make a Payment page. To make a future payment:
- On the eBill homepage under Pay Bill, click Payment Arrangements. The Make a Payment page appears. The fields on this page vary, depending on the status of your account.
- To select a different Billing Account, click Change Billing Account.
- On the Make a Payment page, click Other Amount and enter the amount you want to pay.

Schedule Future Payments. [View full-size image]
- If necessary, enter a date or select it from the calendar in the Payment Date field.
- Select your Payment Method and enter all required information.
- Click Continue.
- The Payment Verification page opens. Check that all information is correct and click Submit.
Note: If any information is incorrect, click Back on the Payment Verification page to return to the previous page.
- If all the information is accurate and you accept the Terms and Conditions, click Submit. The Payment Confirmation page appears.
Your payment has now been recorded and will be processed. Save the payment confirmation number for future reference. When your payment is processed and approved it appears on the Payment History page.
Some browsers save data that you have entered. If you're concerned about other users of your computer obtaining this data, clear the browser cached data (for details, view the documentation for your browser). For security, eBill uses asterisks (*) to mask your data.
